MOVERoute control
Mobility
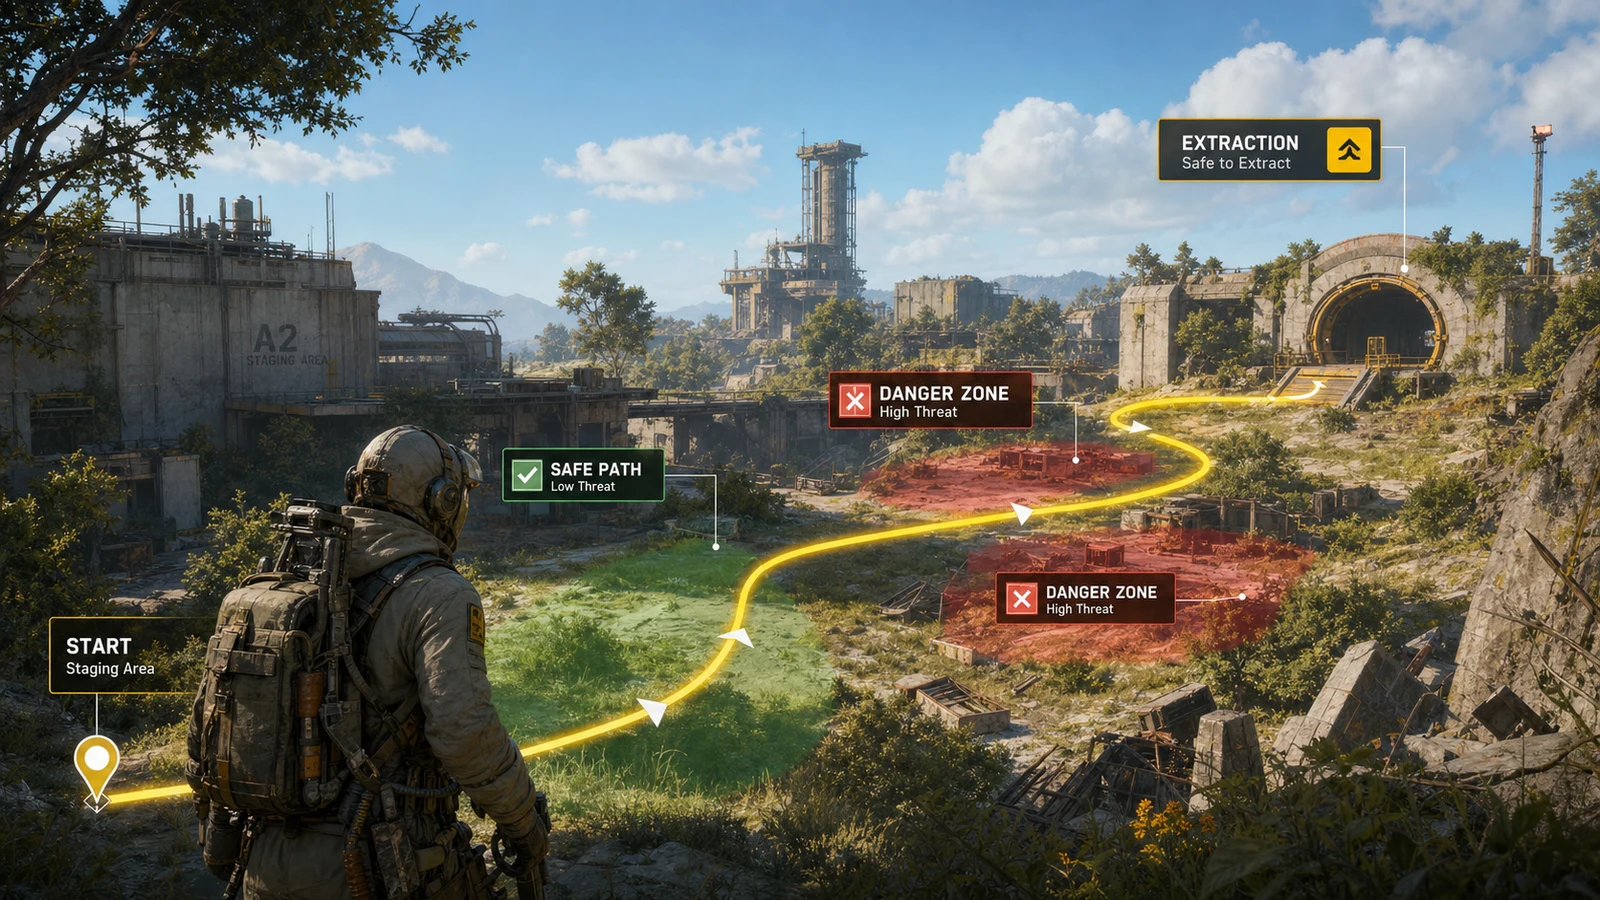
Choose this when the failed raid starts with bad rotations, missed climbs, or no stamina left at extract.
We use cookies for language preferences, analytics, and Google advertising. You can accept optional cookies or keep only essential site storage. See the privacy policy.
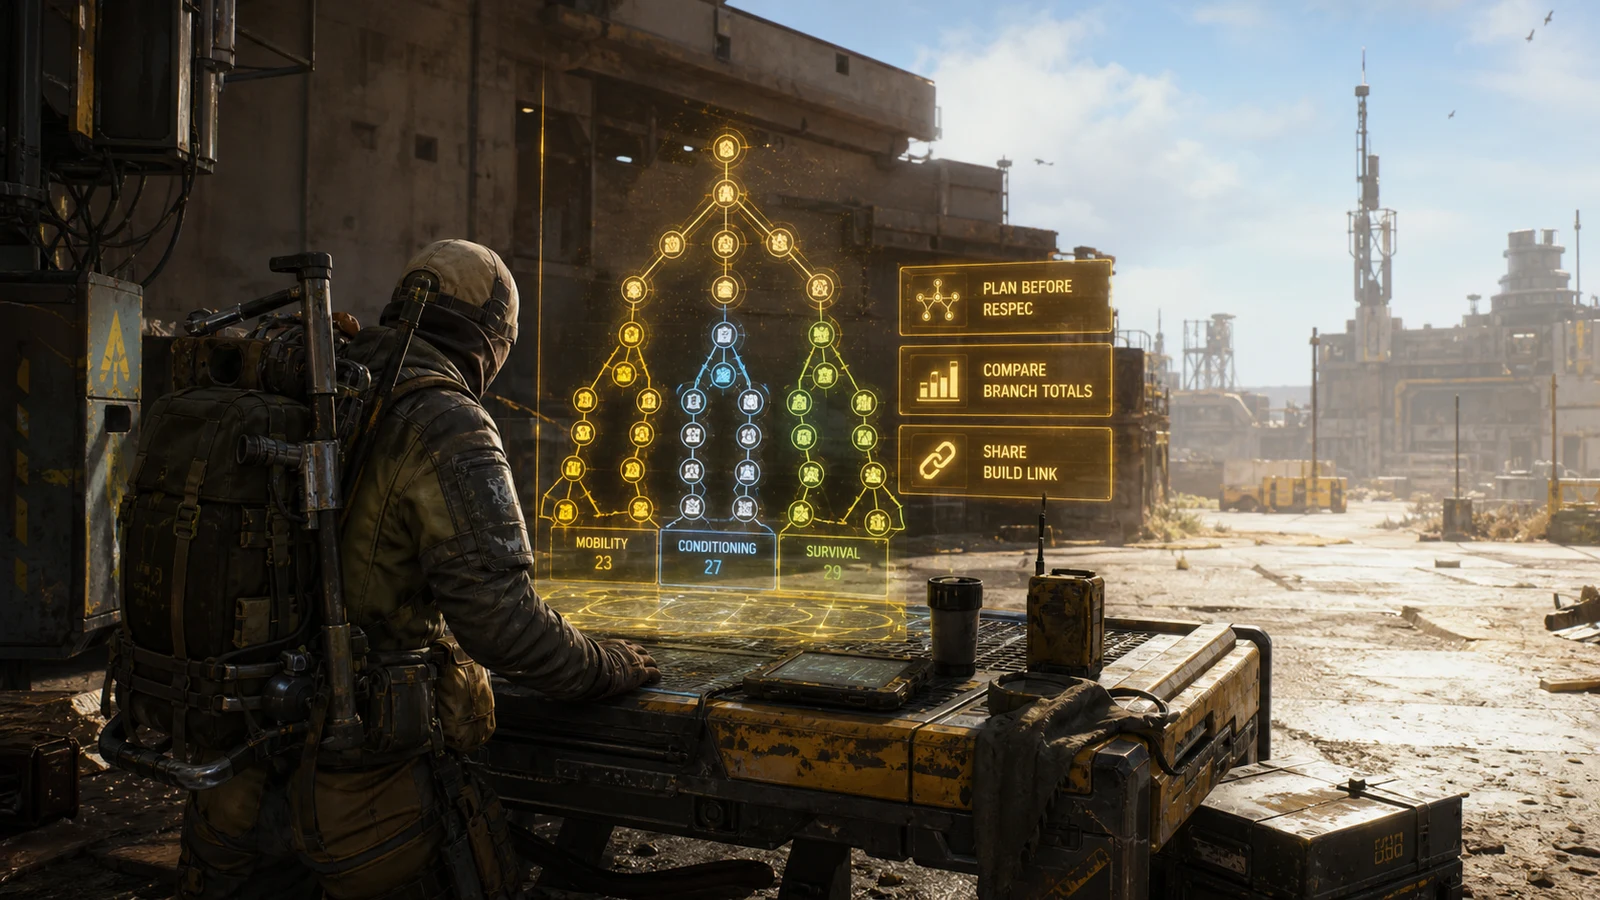
A calculadora definitiva da árvore de habilidades de Arc Raiders. Planeje sua build perfeita, descubra a melhor árvore de habilidades e otimize para PvP e PvE. Nossa calculadora gratuita oferece pré-vias de atributos em tempo real.
Seja você um raider novato ou um veterano maximizando seu equipamento de extração, esta calculadora foi criada para ajudar a testar a build perfeita antes de investir no jogo. Experimente as opções de Mobility, Survival e Conditioning.
Planning workflow
Use the builder as a tactical draft board: set your point cap, compare branch pressure, and save links before changing your in-game route.
Test a full route online before spending in-game reset resources.
Check Mobility, Conditioning, and Survival pressure before copying a build.
Save multiple versions and send exact point paths to your squad.
Branch decision
Think in raid failures first: movement, loot value, or fight pressure. The branch table makes that choice explicit.

| Branch | Best For | Core Value | First Skills | Weakness |
|---|---|---|---|---|
| Mobility | Rotations, chasing, escaping, stamina-heavy raids | Keeps you moving when terrain and pressure decide the run. | Marathon Runner, Youthful Lungs, Nimble Climber | Can feel thin if you ignore loot and fight recovery. |
| Survival | Solo loot runs, quiet extracts, carry value | Turns clean raids into better profit and safer resets. | Agile Croucher, Looter's Instincts, Broad Shoulders | Less direct pressure if you constantly force PvP. |
| Conditioning | PvP pressure, heavy kits, long fights | Improves pressure tools once combat starts lasting longer. | Used To The Weight, Fight or Flight, Proficient Pryer | Needs movement support or it can feel slow. |
Choose this when the failed raid starts with bad rotations, missed climbs, or no stamina left at extract.
Choose this when you can stay alive but leave with weak loot, poor carry value, or no field options.
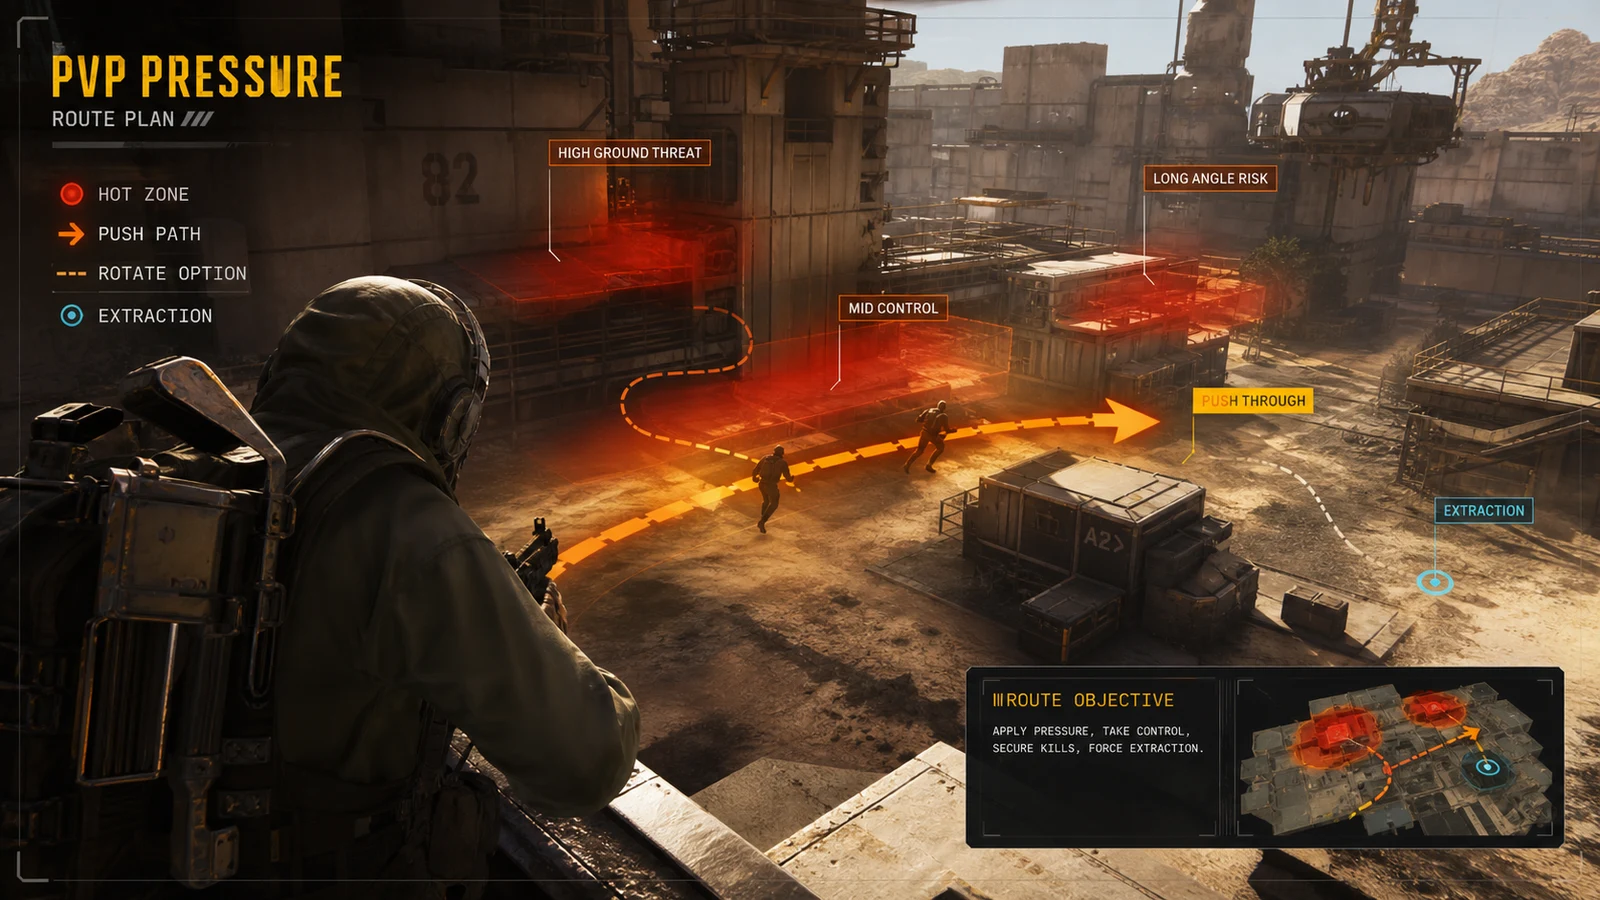
Choose this when fights last longer, shields feel heavy, or pressure windows decide the raid.
Starting routes
These are planning shapes, not fixed rules. Use them to decide where your next points should go.

Survival first
Build around crouch value, loot reading, carry space, and enough Mobility to leave bad routes.
Mobility + Conditioning
Keep stamina and repositioning high, then add fight recovery and pressure skills.
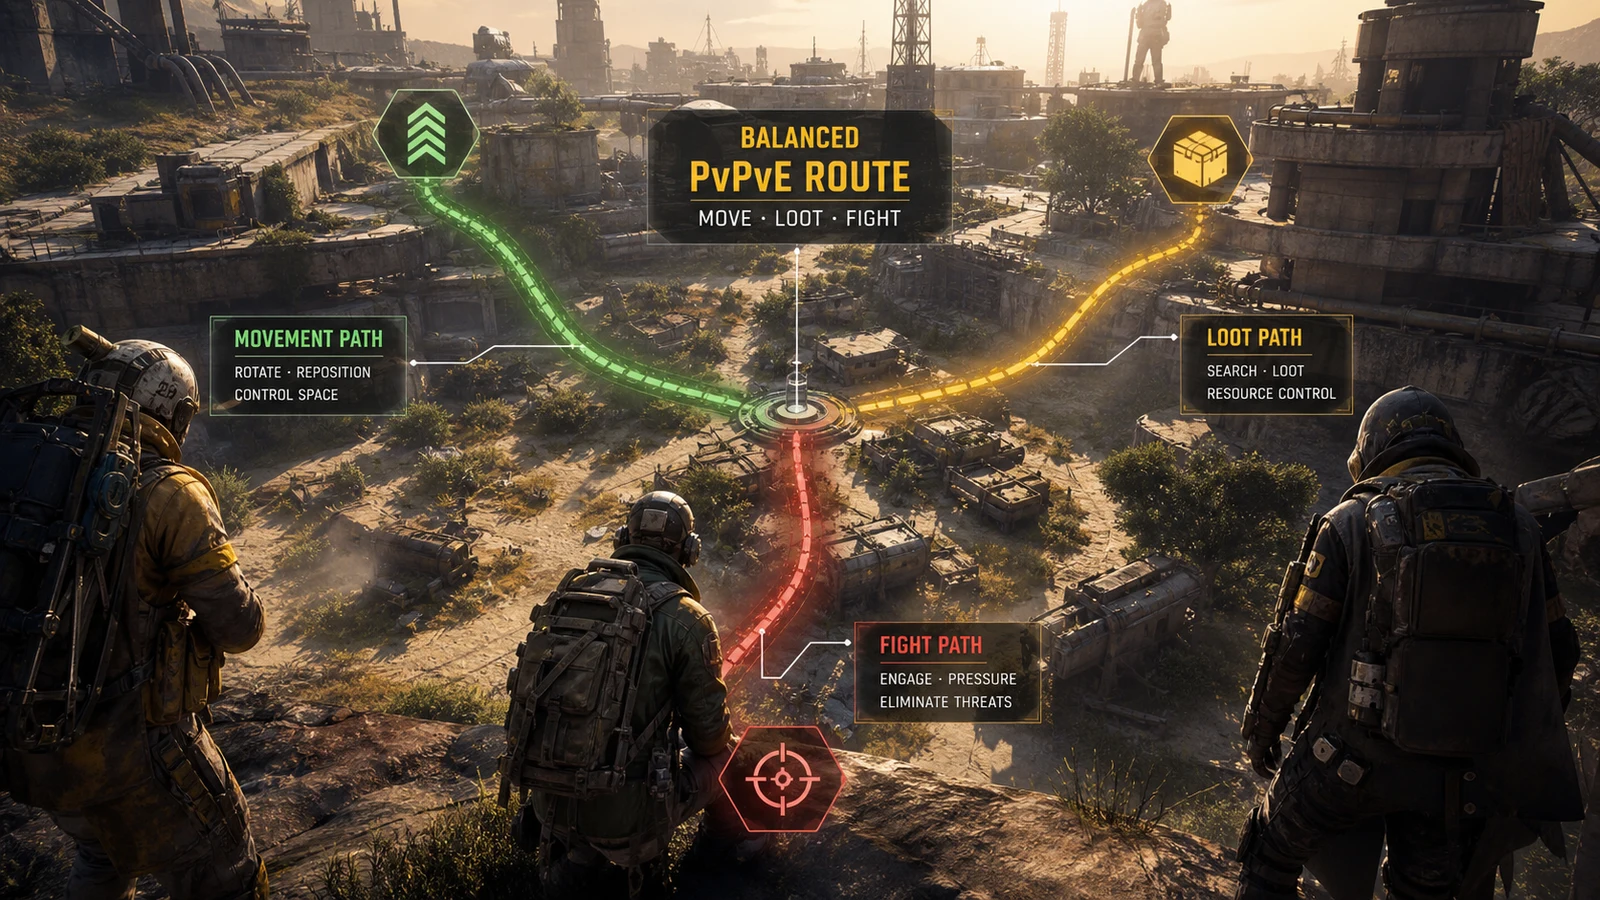
Even split
Use this when you want fewer weaknesses and expect both looting and fights every raid.
Mobility core
Start with movement and stamina, then add Survival once extracts become consistent.
Point cap progression
High-point builds are useful targets, but the playable version should match your current cap.
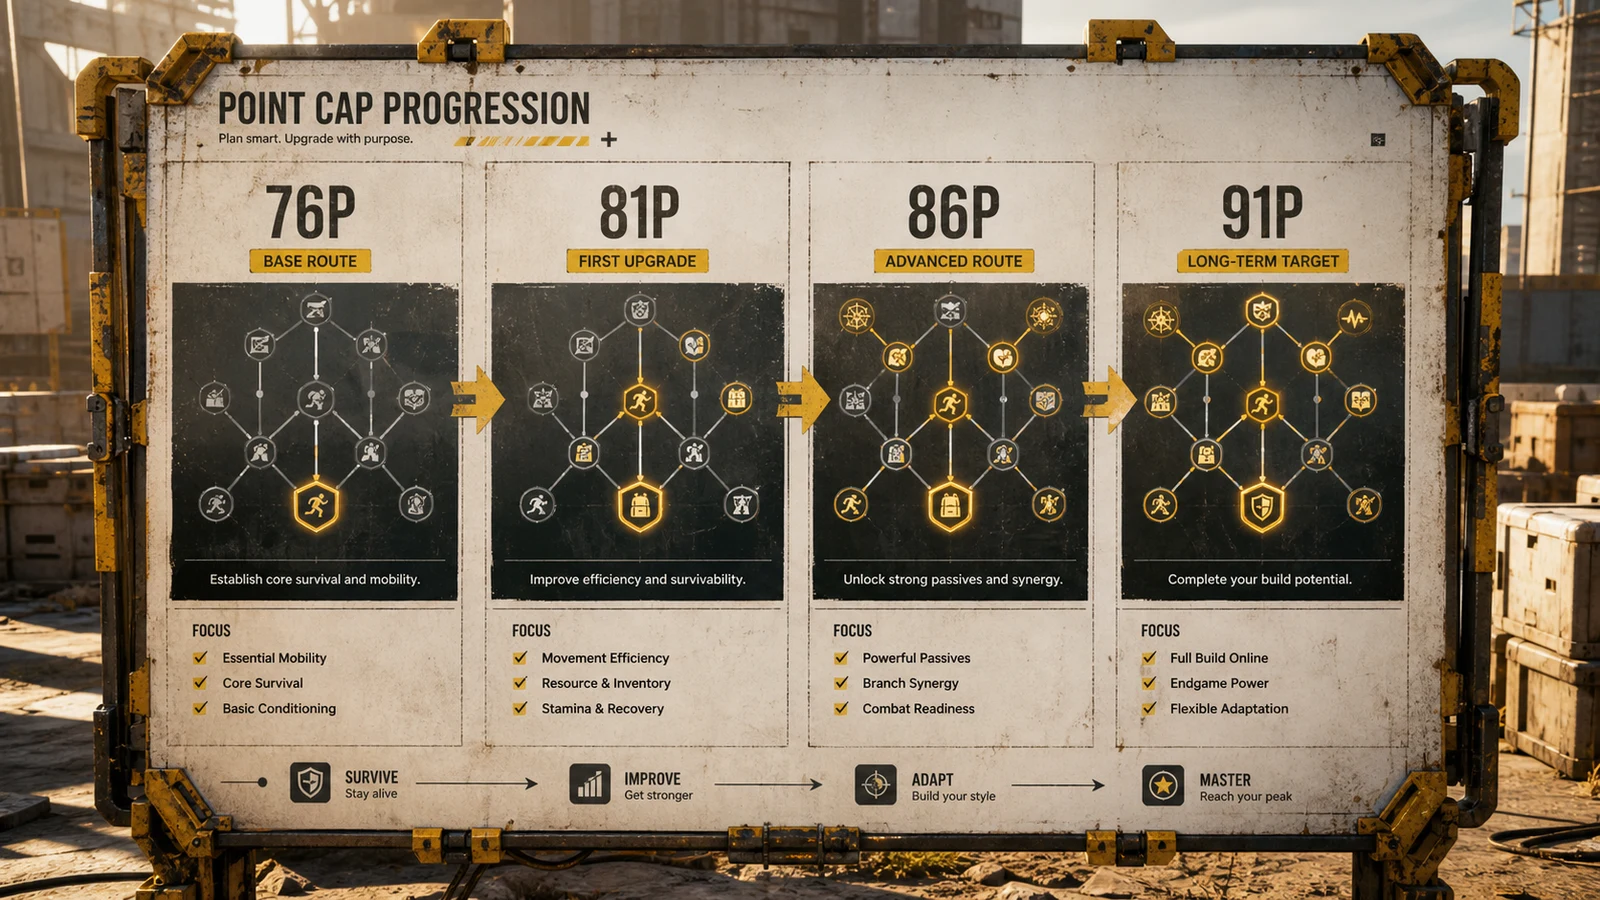
Stage 1
Use as the playable version if you have not earned extra Expedition points.
Stage 2
Add one branch-defining cluster without breaking your main route.
Stage 3
Most creator builds become easier to copy at this point range.
Stage 4
Use for final planning, not as a current build if your account is short.
Tfue skill tree build for ARC Raiders. A balanced 81-point 27/27/27 setup for movement, survivability, and loot efficiency.
PvP focused build with high conditioning and mobility. Features Turtle Crawl for aggressive push plays.
Balanced PvP build with strong conditioning and mobility. Great for aggressive playstyles.
Survival-heavy build focused on breach content. High survivability and looting efficiency.
High-mobility 86-point build with heavy investment into movement routing, stamina economy, and fast repositioning.
Tankier 86-point setup built around Turtle Crawl, recovery layers, and durable late-fight survivability.
PvE-oriented 86-point route that balances breach utility, loot sustain, and broad extraction consistency.
Version 3 of Taxi2g’s 81-point mobility build, tuned for faster rotations and efficient stamina conversion.
Earlier 81-point mobility variant with stronger Survival spend while preserving Taxi2g’s fast traversal core.
Original 81-point mobility setup with strong Conditioning backup and efficient traversal utility.
Crafting-oriented turtle variant with breaching utility, Turtle Crawl, and durable sustain for slower loot-heavy runs.
Standard turtle 81-point setup with layered Mobility, Conditioning resilience, and strong downed-game survivability.
Breach-focused 81-point build with heavy Survival utility and practical extraction-side PvE value.
Conditioning-heavy 76-point build centered on movement uptime, breaching efficiency, and durable utility.
Balanced 81-point build leaning into Conditioning with strong Survival utility and efficient mobility.
Well-rounded 81-point setup with solid mobility, conditioning depth, and dependable survival value.
Balanced 81-point creator build with fast movement, strong conditioning core, and stable survival coverage.
Conditioning-first 81-point setup with strong mobility support and practical loot-side survival tools.
Mobility and Conditioning focused 81-point setup tuned for tempo, stamina management, and reliable fights.
Survival-leaning balanced 81-point build with high looting utility and flexible combat mobility.
Balanced 81-point build with fast traversal, efficient breaching, and strong Survival utility.
Even 27/27/27 creator build with balanced movement, conditioning depth, and dependable survival utility.
76-point Taxi2g setup that drops In-Round Crafting in favor of stronger Mobility and broader Conditioning resilience.
76-point Taxi2g variant that keeps In-Round Crafting while preserving strong mobility tempo and Turtle sustain.
Survival-leaning 81-point build with strong Conditioning support and practical loot-side utility.
Conditioning-heavy 81-point creator build with excellent movement depth and stable survival coverage.
Mobility and Conditioning focused 76-point build with advanced traversal tools and controlled Survival spend.
Survival-heavy 76-point build with enough Mobility to stay fluid and a compact Conditioning core.
Loot-oriented 76-point build with deep Survival investment and a practical Conditioning base.
Tempo-focused 76-point build with strong Mobility core and enough Survival utility to stay efficient in fights.
Survival-maxed 76-point setup with a compact Mobility opener and efficient Conditioning support.
Arc Raiders utiliza um sistema dinâmico. Ao completar incursões, você ganha pontos para investir na árvore. Sua build não é permanente, mas reiniciar no jogo pode ser caro.
Usar um construtor online permite calcular seus atributos finais antes de gastar seus pontos. É ideal para maximizar sua relação Mobilidade-Resistência.
Estratégias avançadas para otimizar sua árvore
Movement is the safest early investment because it helps before, during, and after fights.
Loot skills turn clean raids into better extracts instead of empty survival.
Fight skills matter most after your movement route is already stable.
One utility point can save a long raid when supplies run thin.
Modelos recomendados para cada estilo

Para Sobrevivência
Foca em sobrevivência e saques. Fuja de lutas, regenere estamina e ache mais itens.
Usar Build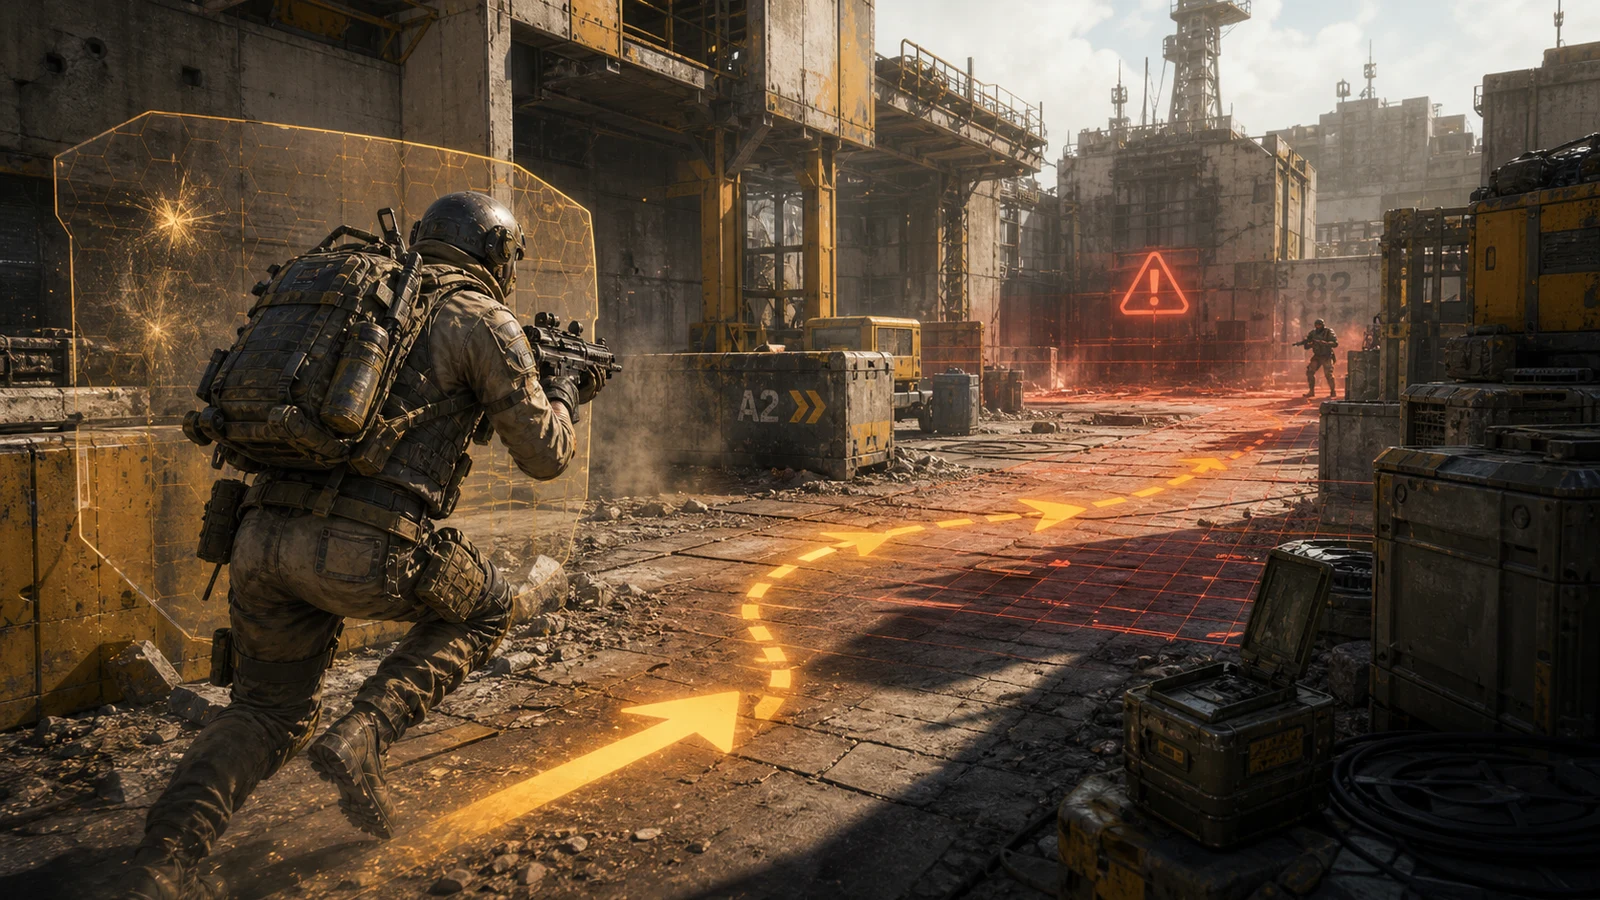
Competitivo Alto Nível
Privilegia ataques continuos, controle da distância e estamina sem fim.
Usar Build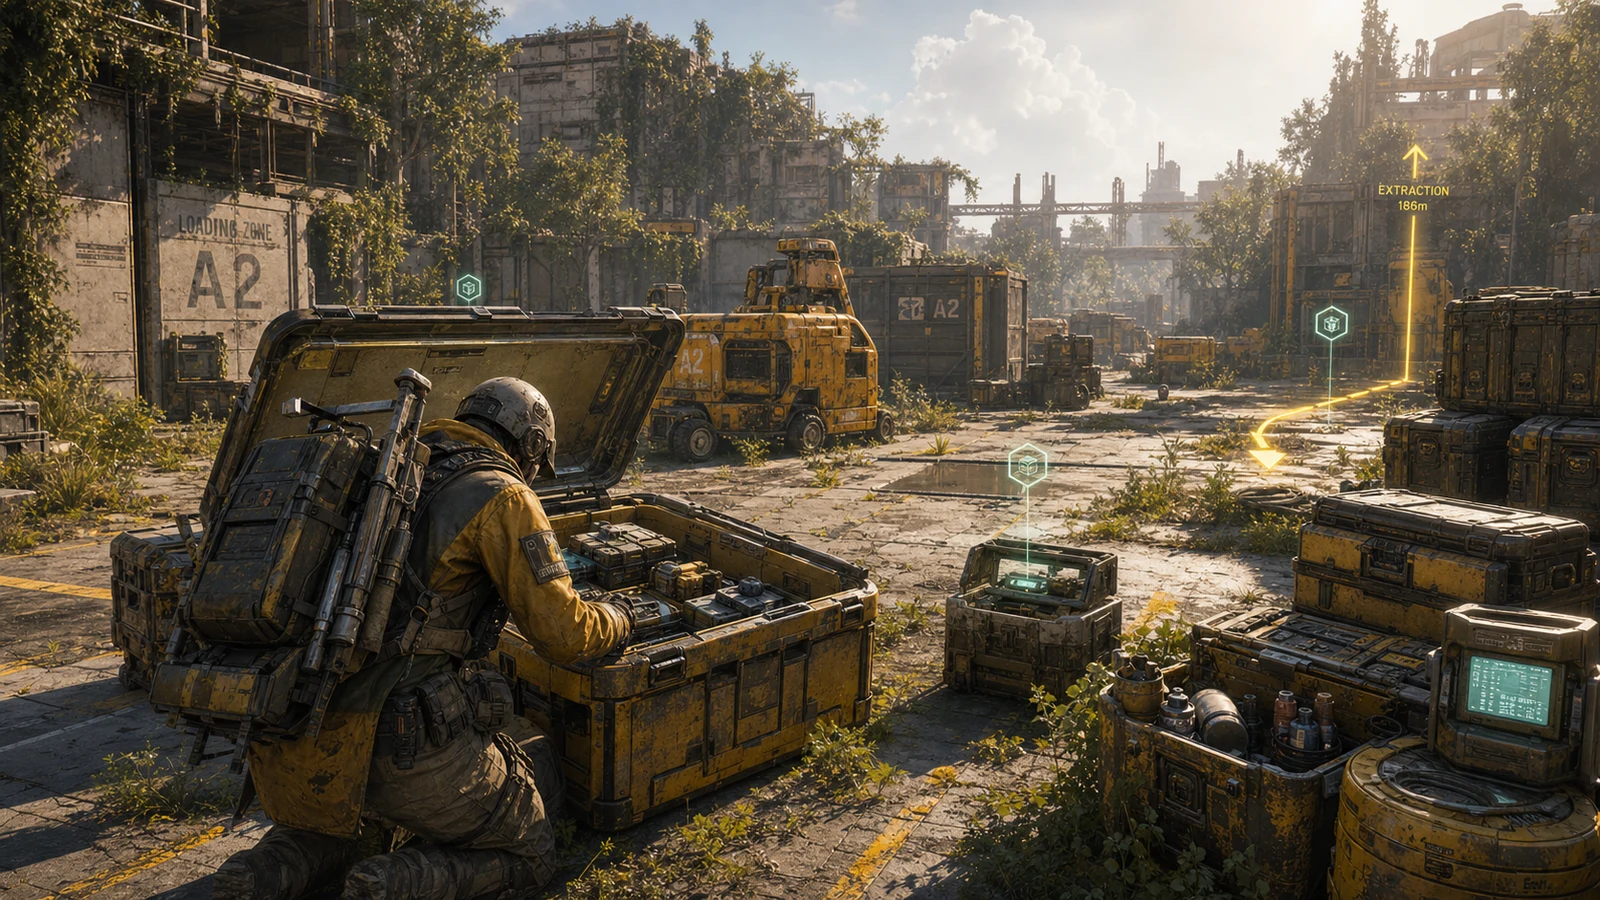
Para Saque Extremo
Agilidade incrivel à frente as zonas desportadas e escassez.
Usar BuildAs escolhas essenciais
Entrar numa partida com as escolhas erradas é quase sinônimo de morrer.
A nossa calculadora serve fundamentalmente para ti testar percursos inteiros rapidamente:

Build analysis
Tfue / Balanced PvPvE baseline / 81 points
Tfue style planning works best as a low-weakness route: enough movement to rotate, enough Survival to leave with value, and enough Conditioning to survive contested fights.
Creator
Tfue skill tree build for ARC Raiders. A balanced 81-point 27/27/27 setup for movement, survivability, and loot efficiency.
Point split
Mobility / Conditioning / Survival distribution.
Published
Use the date as context when comparing older and newer point caps.
Keeps rotations and extraction pushes reliable.
Smooths repeated sprint and reposition windows.
Supports quieter solo movement through risky areas.
Improves loot reads without turning the build into pure farm.
Helps when the route carries heavier kits.
Adds recovery when balanced raids become fights.
| Point cap | Adjustment advice |
|---|---|
| 76p | Keep Mobility stamina skills and trim lower-impact utility points. |
| 81p | Hold the balanced split and add the skill cluster you miss most in raids. |
| 86p | Add extra comfort points around carry value or fight recovery. |